Windows10のPCでGitHubを用いてソースコードを管理する方法の一例として、下記のようなブランチを準備する手順および運用方法を紹介します。
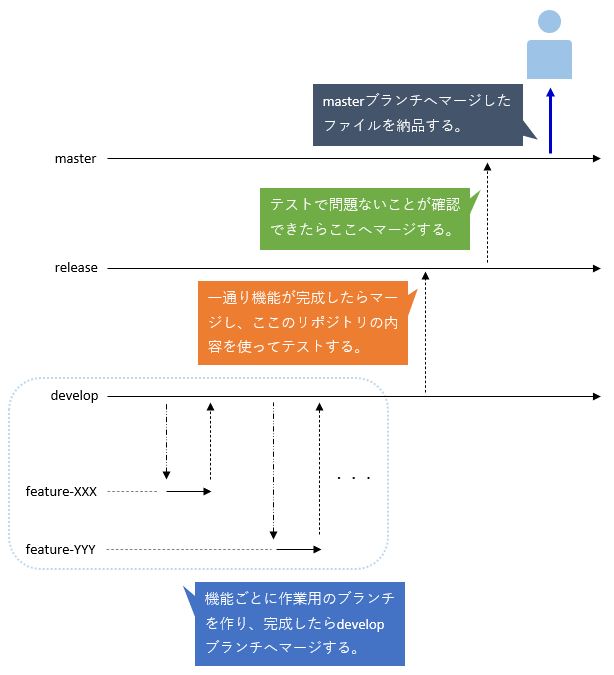
管理用のブランチを準備する
ソースコードを管理するために利用するブランチとして、masterブランチ、releaseブランチ、developブランチを作成する方法を解説します。
リポジトリを作成する
まず下記の記事を参考にリポジトリを作成してください。

本記事ではここで「demonstration」という名前のリポジトリを作成したことにして以降の説明をすることにします。
リポジトリをクローンする
コマンドプロンプトを開きカレントディレクトリをプロジェクト配置したい場所へ移動させ、”git clone {https://リポジトリのアドレス}”ようにgitコマンドを実行します。
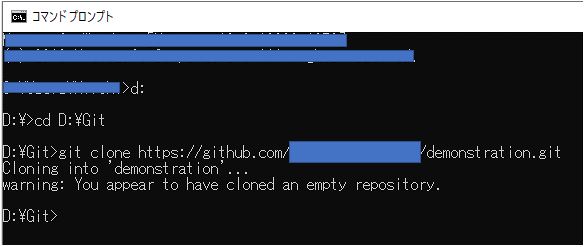
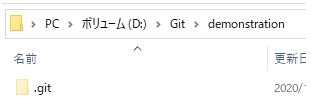
Gitディレクトリの中にdemonstrationリポジトリが作成される
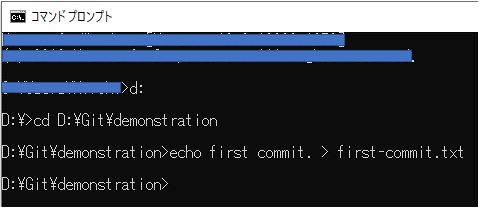
最初のコミットを行う
masterブランチに対し最初のコミットを行います。コミットするにはローカルリポジトリの内容が変更されていなければならないのでコミット用のテキストファイルを新しく作り配置することにします。
1.下記のようなテキストファイルをローカルリポジトリの中に配置します。

(補足)
コマンドプロンプトで、カレントディレクトリをローカルリポジトリの中にしたうえで、”echo first commit. > first-commit.txt”と入力し実行すれば上記のようなテキストファイを作成することができます。
2.コマンドプロンプトを起動し、カレントディレクトリをローカルリポジトリの直下へ移動します。
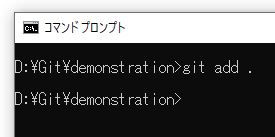
3.”git add .”コマンドでステージングエリア(インデックス)へ変更内容を追加します。
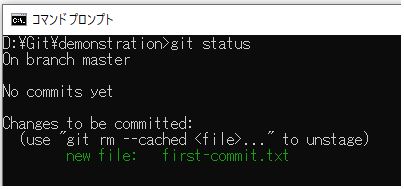
4.”git status”コマンドを実行し、ステージングエリア(インデックス)に登録されていることを確認します。
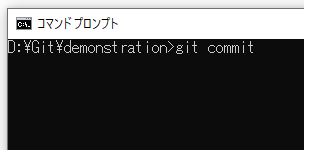
5.”git commit”コマンドを実行します。
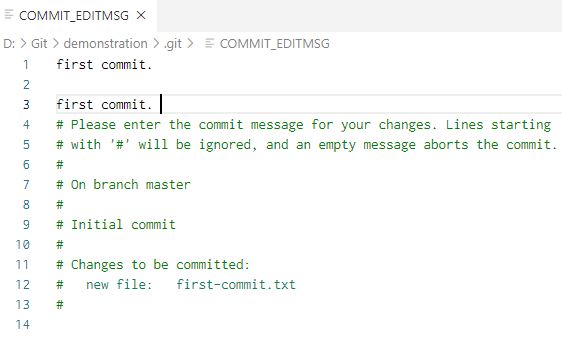
6.コミットの内容を書き込みます。※ここでどのエディターが開かれるかは設定内容によって異なります。
1行目にタイトルを記載します。
2行目は空行とします。
3行目以降に編集内容の詳細を記述します。
編集が終わったらエディターを閉じてください。
※エディターによってコミットを完了させる方法は異なる可能性があるので適宜対応してください。コマンドプロンプトの画面に操作方法が書かれているのではないかと思います。
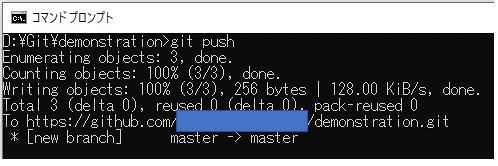
7.”git push”コマンドでローカルリポジトリをリモートリポジトリへプッシュします。
ブランチを複製する
上記で作成したmasterブランチを元にreleaseブランチを作成し、次にreleaseブランチを元にdevelopブランチを作成します。
1.コマンドプロンプトを起動し、カレントディレクトリがプロジェクトの直下にある状態にします。
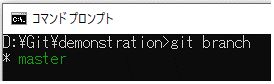
2.”git branch”コマンドを実行し、操作対象のブランチがmasterブランチになっていることを確認します。
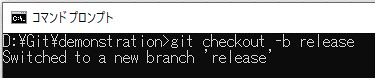
3.”git checkout -b release”とコマンドを入力して実行し、masterブランチを元にreleaseブランチを作成します(現在のブランチがmasterブランチなのでmasterブランチを元にreleaseブランチが作成されます)。
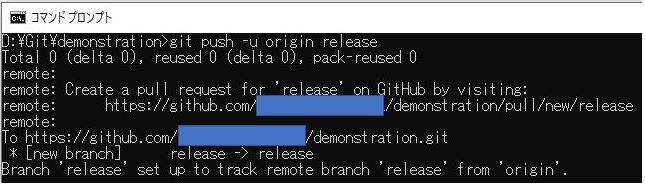
4.”git push -u origin release”コマンドを実行し、releaseの上流ブランチをreleaseに設定したうえでプッシュします。
5.”git checkout -b develop”とコマンドを入力して実行します(現在のブランチがreleaseブランチなのでreleaseブランチを元にdevelopブランチが作成されます)。

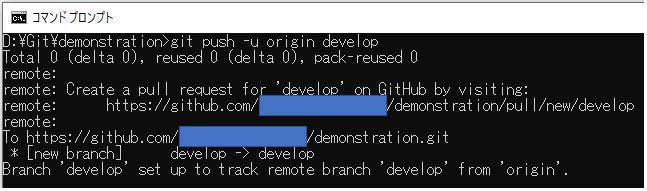
6.”git push -u origin develop”コマンドを実行し、developの上流ブランチをdevelopに設定したうえでプッシュします。
開発の流れ
以上で管理用のブランチが出来上がったと思います。ここからはdevelopブランチをクローンして作業用のブランチ(ここではfeature-XXXとします)を派生し、派生した作業用のブランチに対して作業内容をコミットします。そして一通り作業を終えたら作業用ブランチの内容をdevelopブランチへマージやプルリクエストをしながら各作業用ブランチの内容を統合していきます。
そして、全ての作業をdevelopブランチへ統合できたら、その内容をreleaseブランチへプルリクエストして統合します。統合されたreleaseブランチの内容を使ってテストし、テストが問題なく終わればreleaseブランチの内容をmasterブランチへプルリクエストして統合し、masterブランチの内容を納品やバージョン管理する流れとなります。
ここでは、作業用のブランチ”Feature-XXX”を作り、Feature-XXXへ編集内容をコミットし、コミットした内容をdevelopブランチへマージおよびプルリクエストする手順を紹介します。
※developブランチからreleaseブランチへのプルリクエストおよびreleaseブランチからmasterブランチへのプルリクエストする手順は省きます。
developブランチを元に作業用のブランチを作る
1.コマンドプロンプトのカレントディレクトリをクローンする場所にします。
2.”git clone -b develop {https://リポジトリのアドレス}”のようにコマンドを実行し、リモートリポジトリのdevelopブランチをクローンします。

3. 2でクローンしたプロジェクトの直下へカレントディレクトリを移動します。
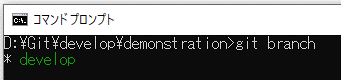
4.”git branch”コマンドで現在のブランチがdevelopになっていることを確認します。
5.”git checkout -b {新しく作るブランチ名}”のようにコマンドを実行し、developブランチを元にfeature-XXXブランチを作成します。

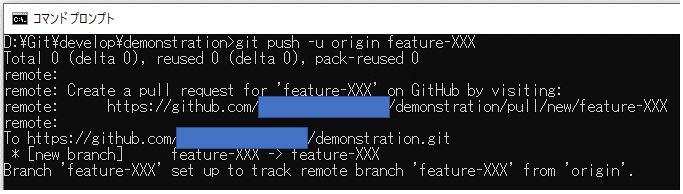
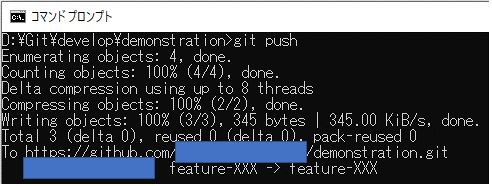
6.”git push -u origin {上流ブランチ名}”のようにコマンドを実行し、feature-XXXの上流ブランチをfeature-XXXに設定したうえでプッシュします。
作業用のブランチに編集内容を登録する
編集した内容を作業用のブランチ(feature-XXX)へコミットします。ここではデモ用として”develop-commit.txt”というテキストファイルを新規作成して配置し、その内容をコミットすることにします。
1.コマンドプロンプトを起動し、カレントディレクトリをローカルリポジトリの直下へ移動します。
2.”echo commit for develop. > develop-commit.txt”とコマンドを実行します(カレントディレクトリに”commit for develop.”という内容の”develop-commit.txt”という名前のテキストファイルが出来上がります)。

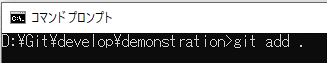
3. “git add .”とコマンドを入力して実行し、2の内容をステージングエリアに登録します。
4.”git commit”とコマンドを入力して実行して変更内容をコミットします。
5.”git push”コマンドでローカルリポジトリの編集内容をリモートリポジトリに登録します。
作業用のブランチの編集内容をdevelopブランチへ統合する
作業用のブランチへ作業した内容をコミットしたら、次はその内容をdevelopブランチへ統合します。統合する方法としてマージまたはプルリクエストが考えられます。
方法1:マージ
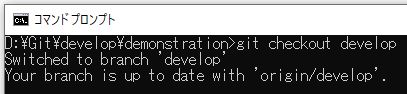
1.”git checkout develop”のようにマンドを実行し、操作操作のブランチを”develop”ブランチに切り替えます。
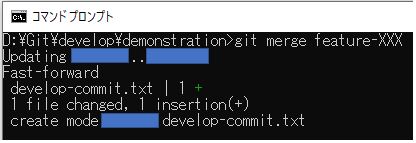
2.”git merge {作業用のブランチ名}”のようにコマンドを実行し、feature-XXXブランチの内容をdevelopブランチへマージします。
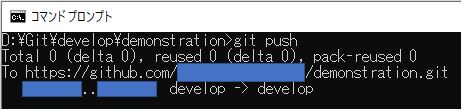
3.マージされた状態のdevelopブランチをリモートリポジトリへpushします。
方法2:プルリクエスト
1.GitHubにサインインします。

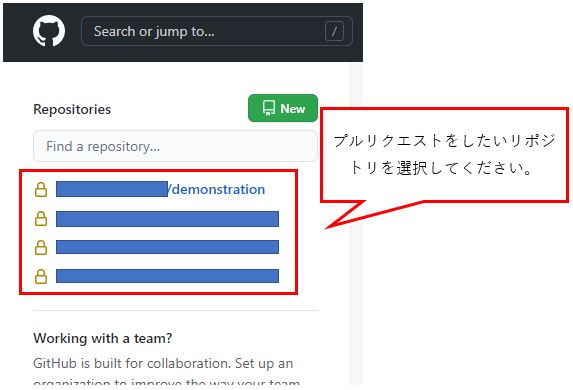
2.プルリクエストを行うリポジトリを適宜選択します。
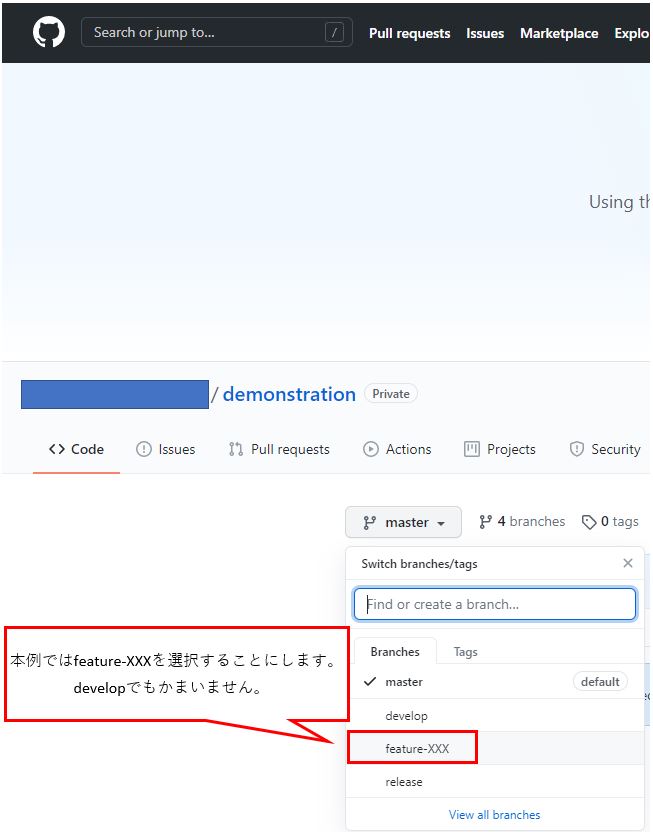
3.プルリクエストを行うブランチを選択します(マージする側またはマージされる側どちらでもかまいません)。本例ではfeature-XXXの内容をdevelopブランチへマージするようプルリクエストを行いたいのでfeature-XXXを選択しています。
4.[Pull request]をクリックします。

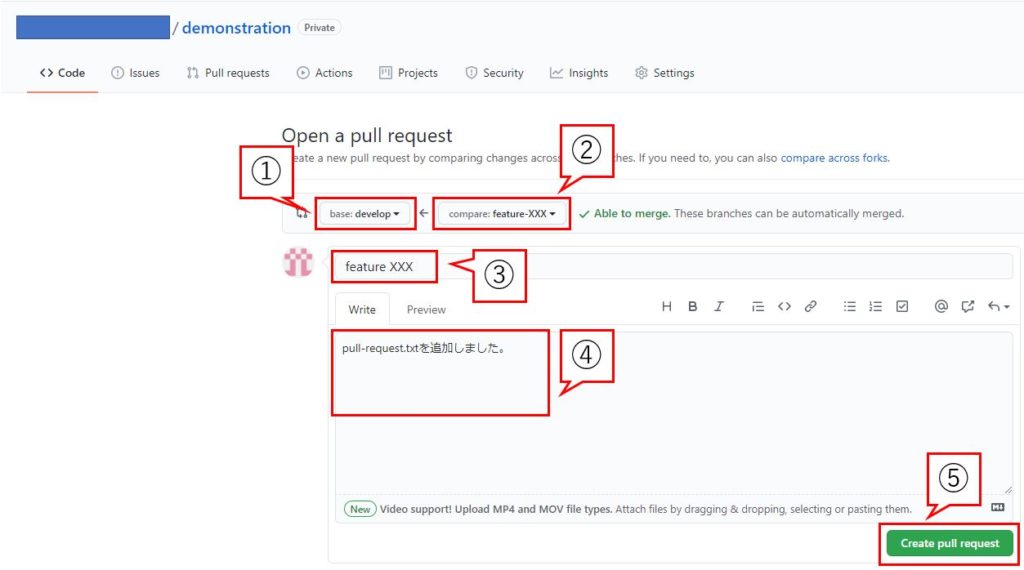
5.プルリクエストの申請画面が表示されるので下記を行います。
①マージされるブランチを”base”プルダウンから選択します。
②マージするブランチを”compare”プルダウンから選択します。
③編集した内容のタイトルを書き込みます。
④編集した内容の詳細を書き込みます。
⑤[Create pull request]をクリックします。
ここからはプルリクエストされた(承認を依頼された)人が行う操作です。
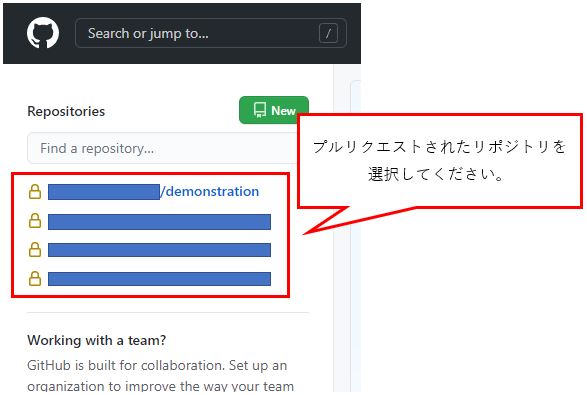
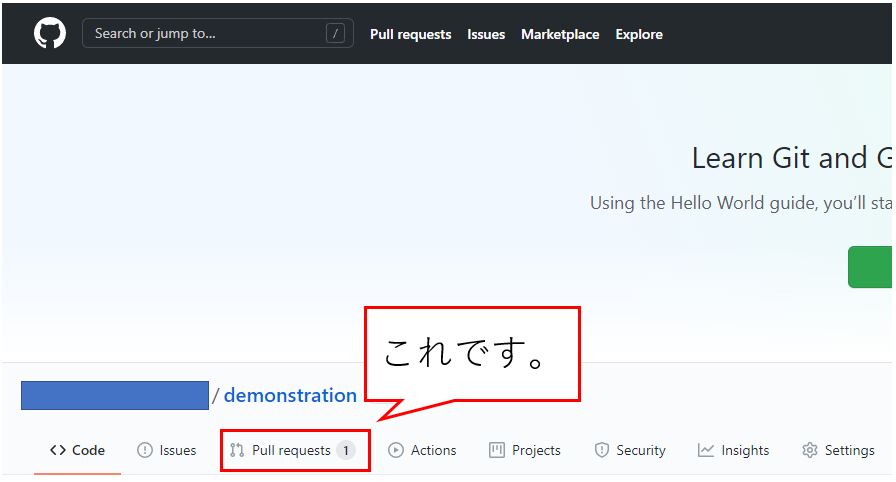
6.GitHubへアクセスし、プルリクエストされたプロジェクトを選択します。
7.[Pull requests]をクリックします。
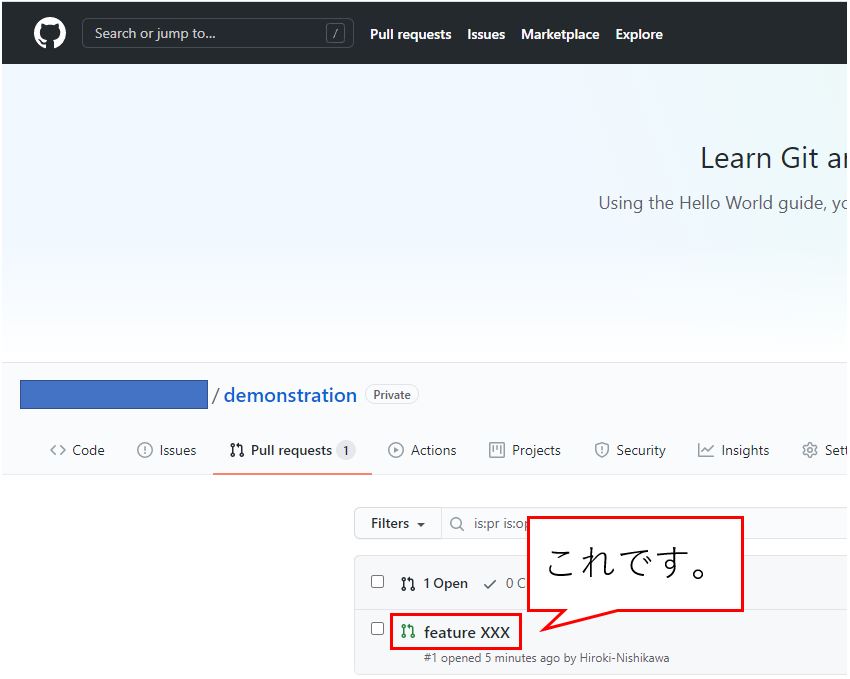
8. 5の③で入力したプルリクエストのタイトル(本例では”feature XXX”)をクリックします。
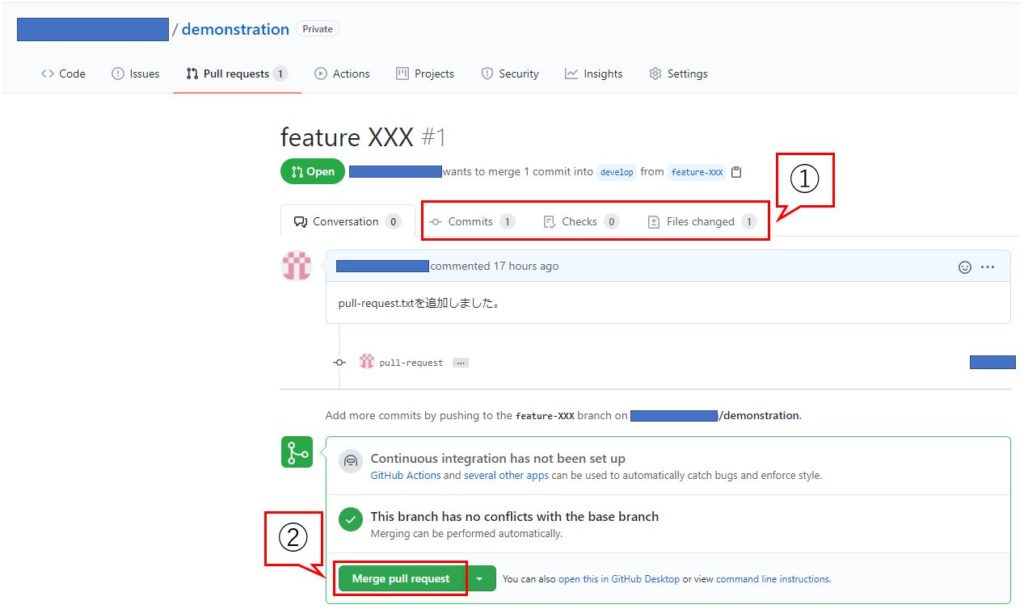
9.依頼者が変更を行った内容を確認することができるので適宜確認し(①)、問題なければ[Merge pull request]をクリックします(②)。
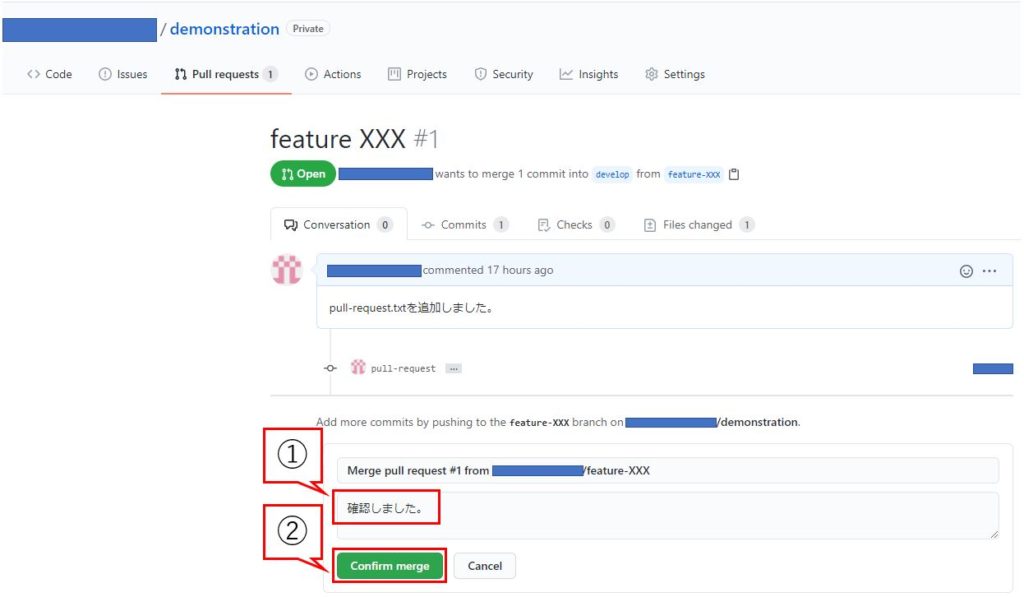
10.コメントを適宜書き込み、[Confirm merge]をクリックします。
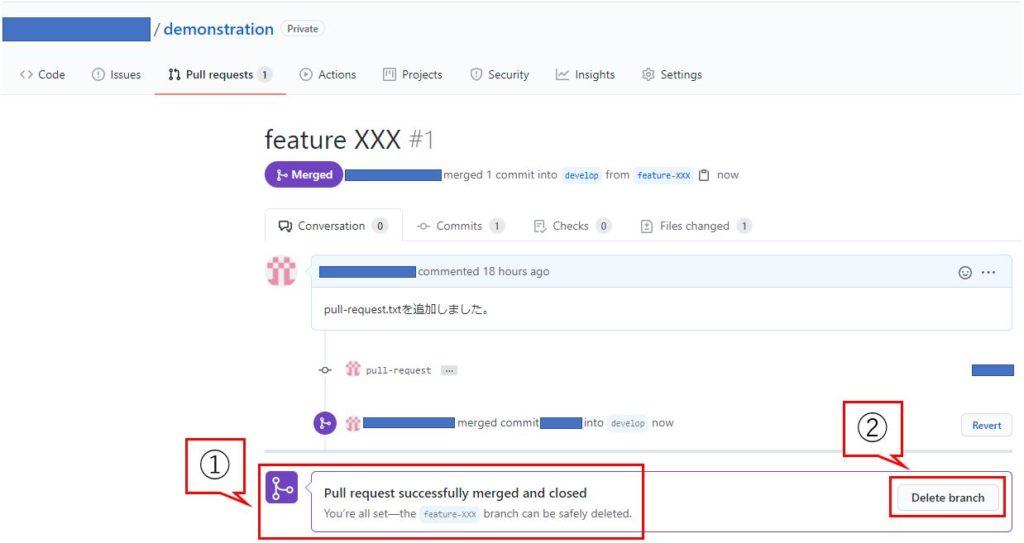
11.プルリクエストが完了した旨のメッセージが表示されます(①)。マージしたブランチが必要なければ[Delete branch]をクリックしてください(②)。
以上となります。参考になれば幸いです。