
【VisualStudio】Gitでソースコードを管理する方法(準備編)の記事で準備した、VisualStudioのプロジェクトをGitで管理する手順の一例を紹介します。あくまでも一例です。
GitのホスティングサービスはGitLab(https://gitlab.com/)を用いることにします。またVisualStudio2017を用いることとします。
また、OSはWindows10を使って紹介します。
リモートリポジトリからソースをクローンする
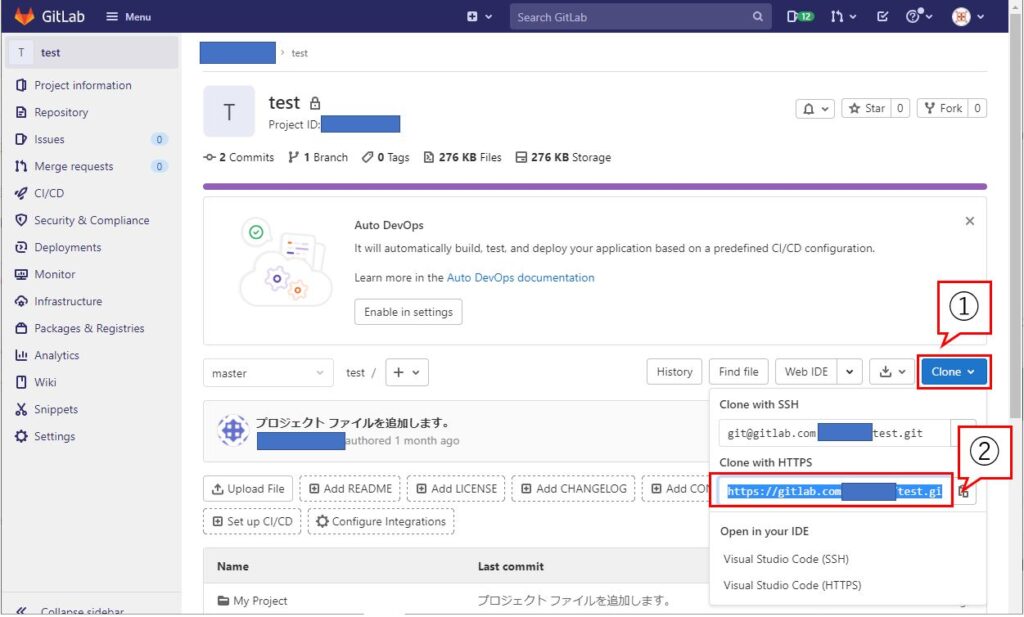
1.GitLabのダッシュボードを開き、改修するプロジェクトを開きます。
2.[Clone]を開き(①)、”Clone with HTTPS”のURLをは後で使うのでコピーしてメモ帳などに記録しておきます。(②)。
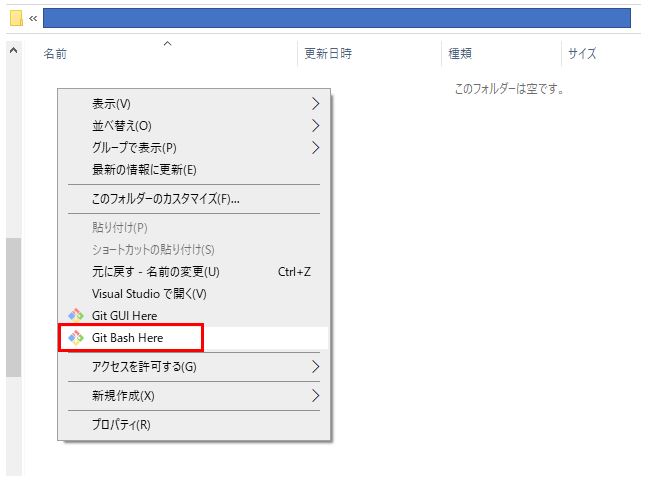
3.エクスプローラーでクローンする場所を開き、右クリックして[Git Bash Here]をクリックします。
4.”git clone {〇〇でコピペしたURL}”のように入力し、Enterをクリックします。
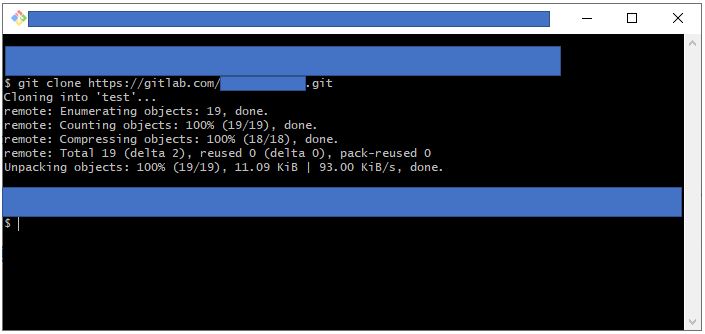
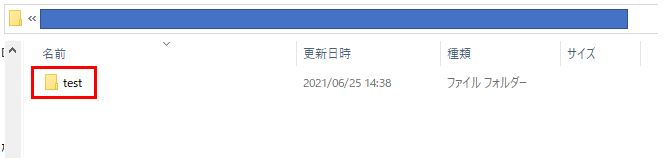
これで手順3の場所にプロジェクトがクローンされます。
masterブランチをベースに作業用のブランチを作る
上記から作業が続いているものとします。
1.VisualStudioでクローンしたプロジェクトを開きます。
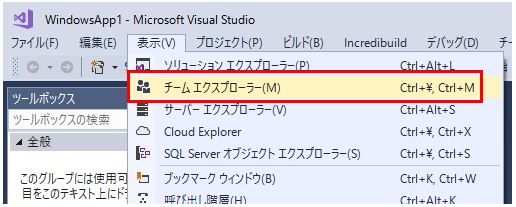
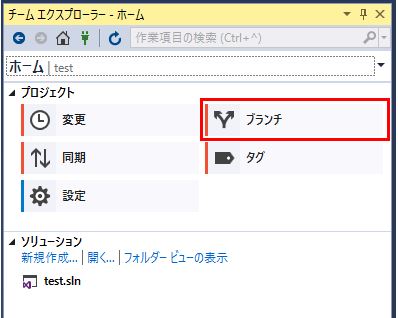
2.[表示(V)] -> [チームエクスプローラー(M)]をクリックします。
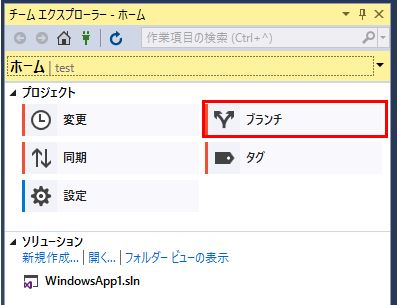
3.ブランチをクリックします。
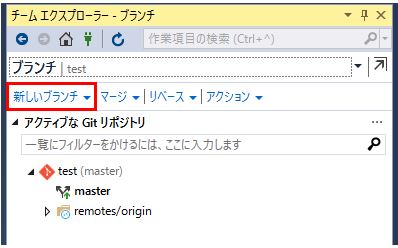
4.[新しいブランチ]をクリックします。
5.下記手順を行います。
①新しいブランチの名前を入力します。※その下のプルダウンの値(*1)は既に”master”と入力されているかと思いますがこれが作成元のブランチ名となります。このままでOKです。
②”ブランチのチェックアウト”にチェックがついていることを確認します。
③[ブランチの作成(R)]をクリックします。
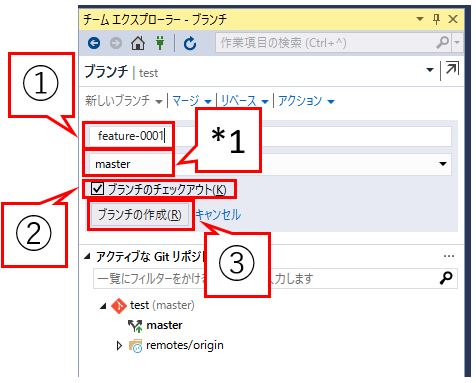
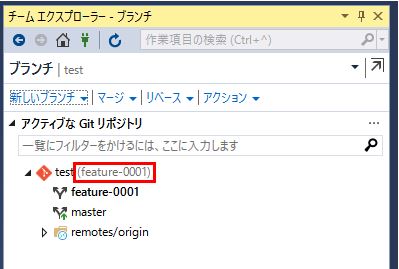
6.ローカルブランチの名前横の括弧の中が、新しく作成したブランチの名前になっていることを確認します。本記事での例の場合は”feature-0001″となります。
作業用ブランチをプッシュしてマージリクエストをする
上記から作業が続いているものとします。
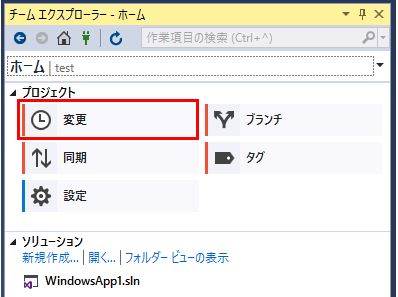
1.ソースコードの改修作業が終わったら、チームエクスプローラーの[変更]をクリックします。
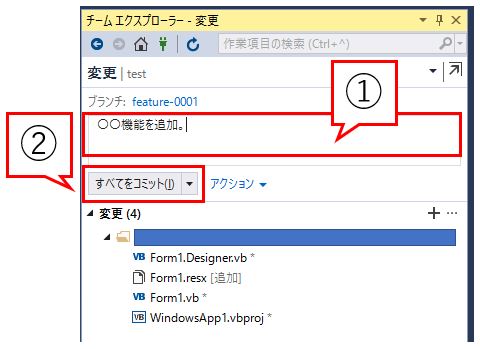
2.変更内容をコメントし(①)、[コミット(I)]をクリックします(②)。
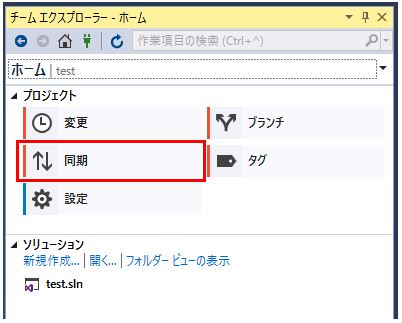
3.[同期]をクリックします。
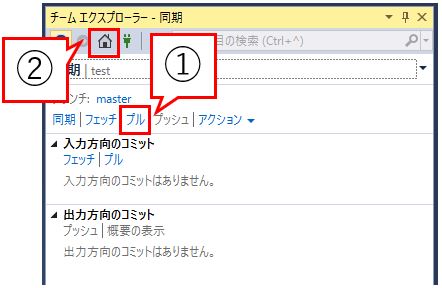
4.[プッシュ]をクリックします。
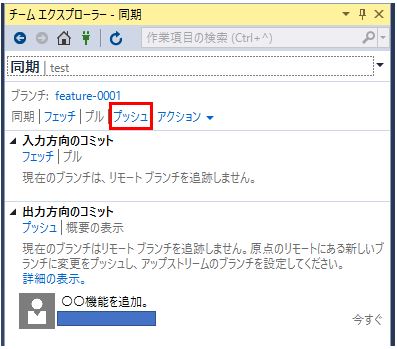
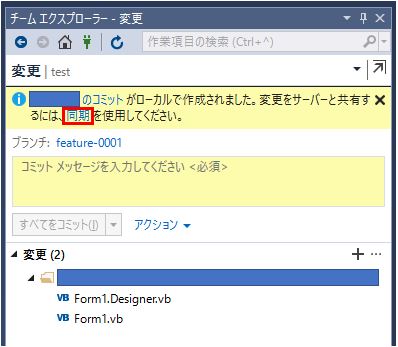
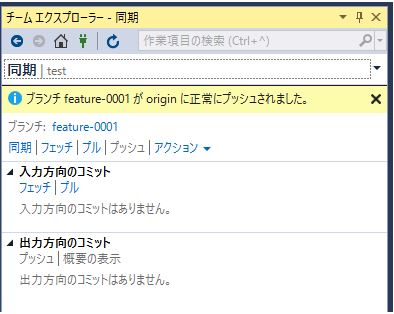
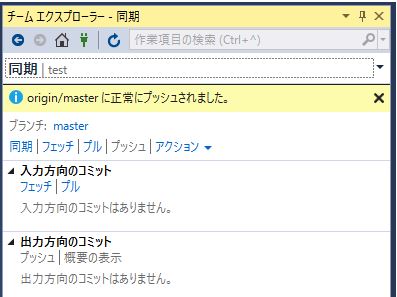
プッシュが成功したら↓のような画面になると思います。
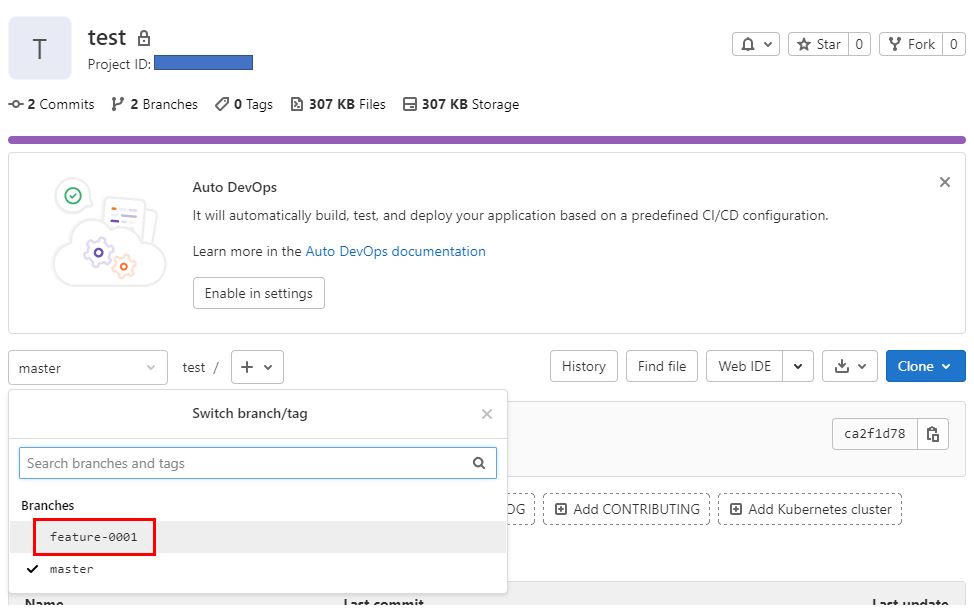
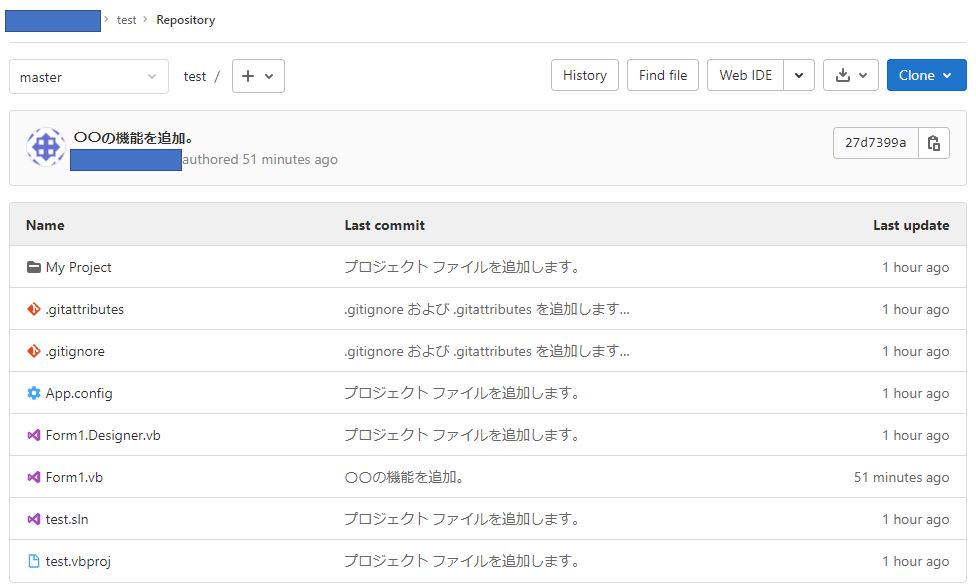
GitLabでプロジェクトの画面を開くと、新しいブランチが反映されているはずです。
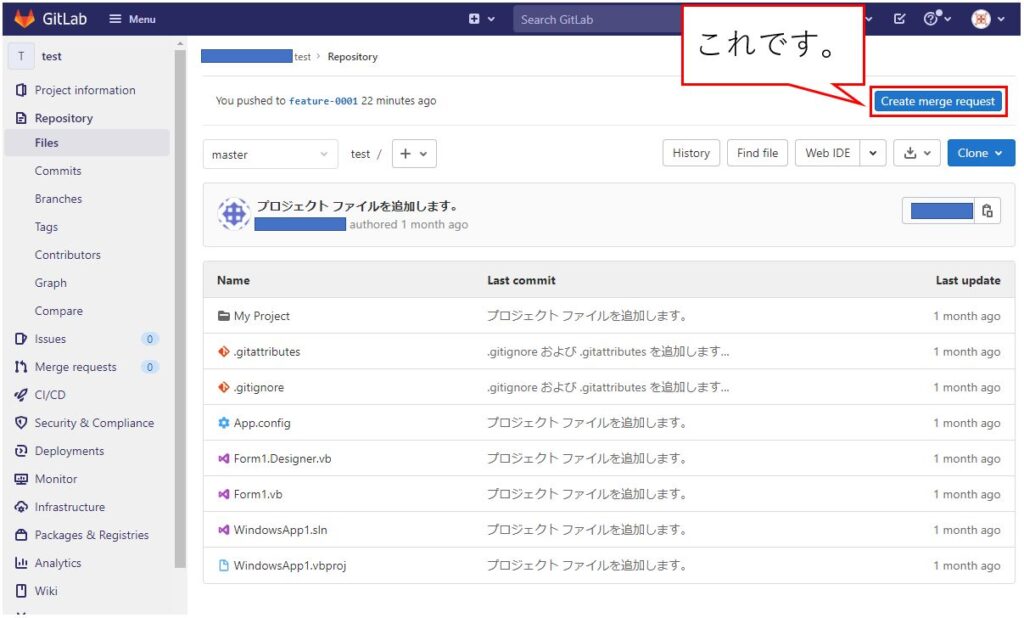
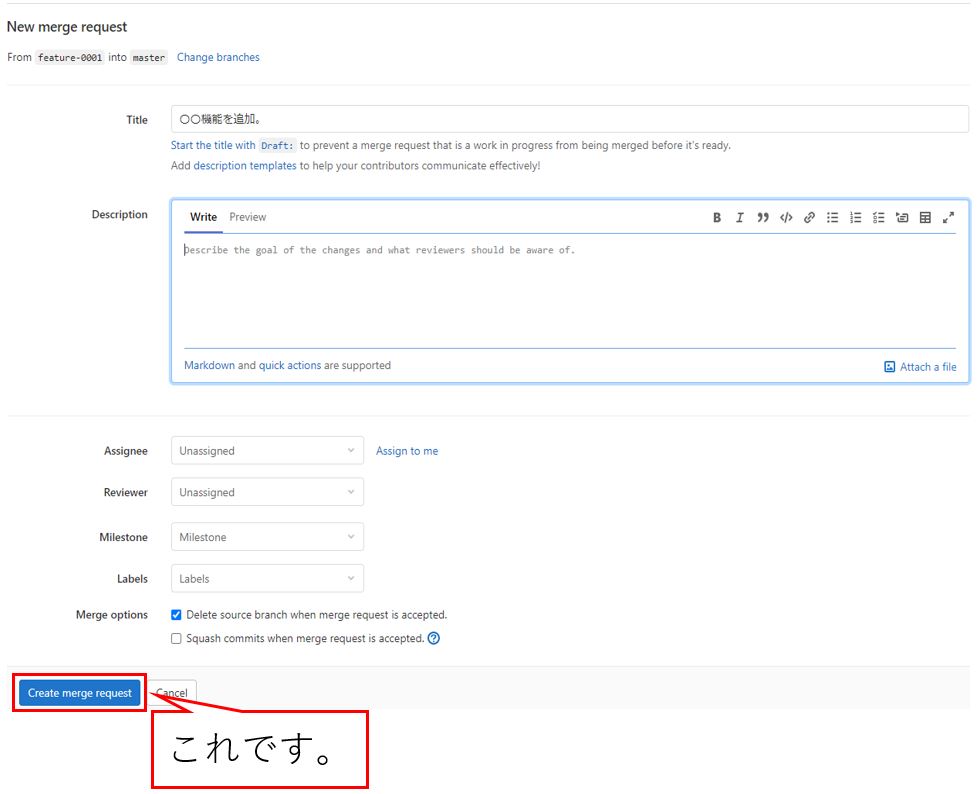
5.GitLabでプロジェクトの画面を開き、[Create merge request]をクリックします。
6.適宜必要箇所に入力のうえで、[Create merge request]をクリックします。
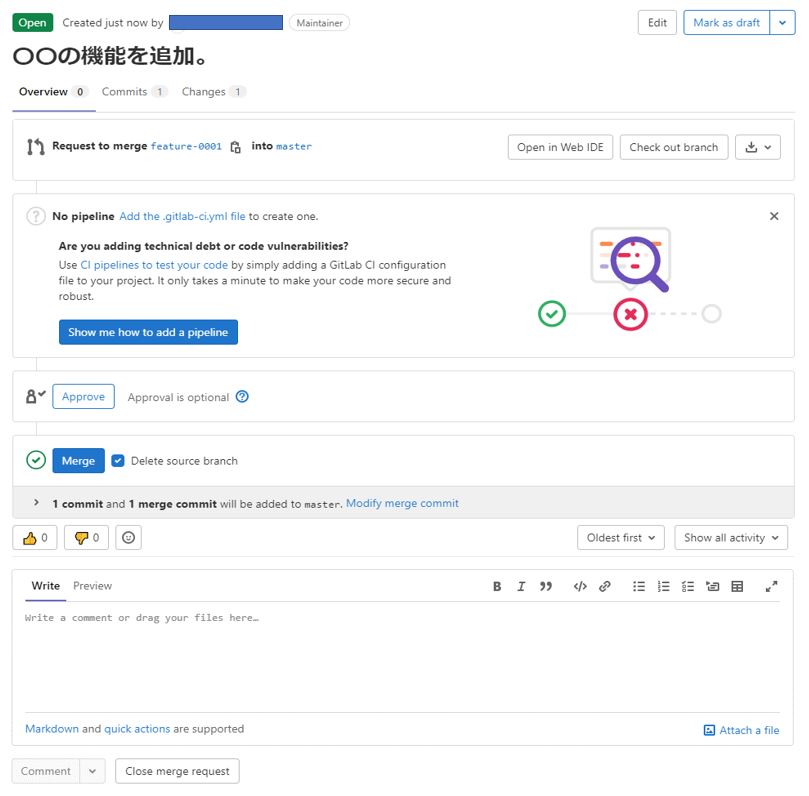
7.これで、担当者などに適宜レビューをしていただきソースコードに関するやりとりを行うことができます。
※問題なければこの画面の[Merge]コマンドを使用すれば作業ブランチの内容をmasterブランチにマージすることができますが、本記事の手順ではマージリクエストの用途は作業者とレビュー担当の会話だけとします。
本記事ではここで[Merge]コマンドを使用せず、以降の手順でコードを書いた人自身がローカルリポジトリの中で作業ブランチの内容をmasterへマージし、そのmasterをリモートへプッシュする、という流れとします。
ローカルリポジトリでmasterブランチへマージする
上記の手順で、マージリクエストの内容が承認されているものとします。
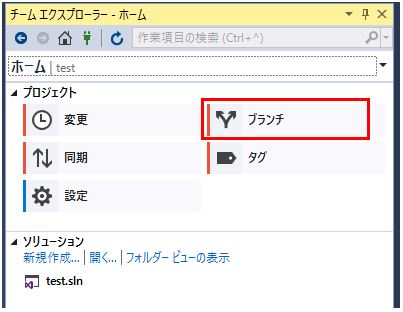
1.チームエクスプローラーで[ブランチ]をクリックします。
2.下記手順を行います。
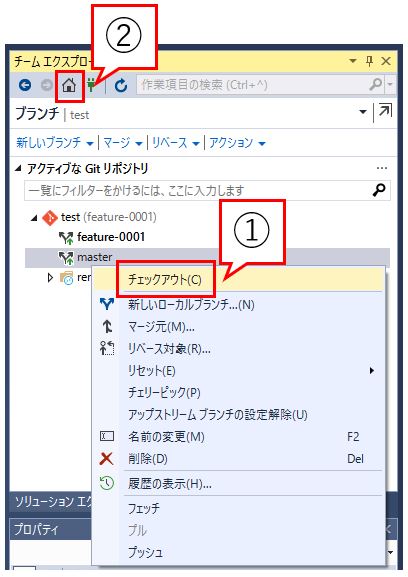
①masterブランチを右クリックし、[チェックアウト(C)]をクリックします。
②ホームボタンをクリックします。
3.[同期]をクリックします。
4.下記手順を行います。
①[プル]をクリックします(masterを最新の状態にするための作業です)。
②ホームボタンをクリックします。
5.[ブランチ]をクリックします。
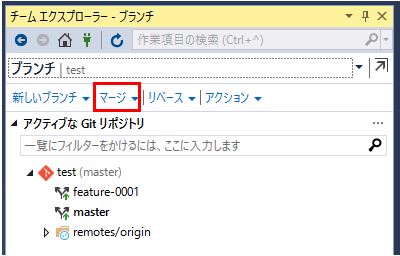
6.[マージ]をクリックします。
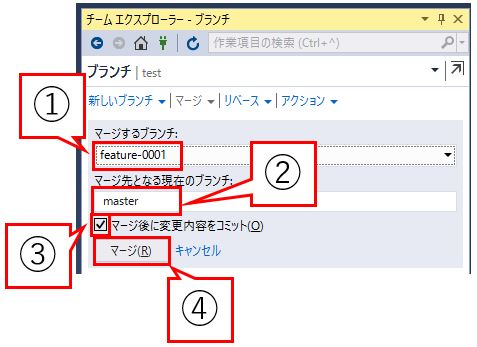
7.下記手順を行います。
①”マージするブランチ;”の欄に作業ブランチを指定します*1
②マージ先となる現在のブランチ;の値が”master”になっていることを確認します。
③”マージ後に変更内容をコミット(O)”のチェックボックスにチェックをつけます。
④[マージ(R)]をクリックします。
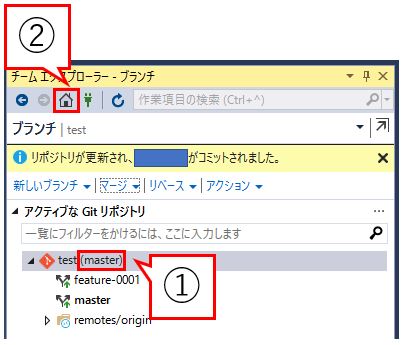
8.下記手順を行います。
①ローカルブランチの名前横の括弧の中が、新しく作成したブランチの名前になっていることを確認します。
②ホームボタンをクリックします。
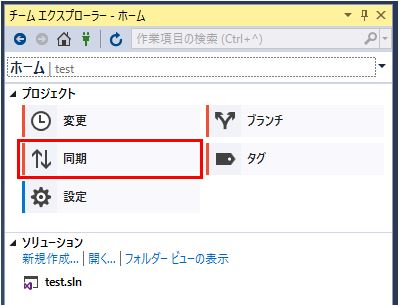
9.[同期]をクリックします。
10.プッシュをクリックします。
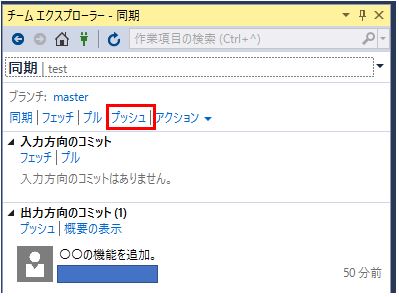
これで下記のような画面になると思います。
GitLab上で当該のProjectを確認すると、作業ブランチで改修した内容がmasterブランチに反映されていることが分かるかと思います。
以上となります。参考になれば幸いです。