
SQLServerでの差分バックアップの方法を解説します。
注意
本記事ではバックアップやリストアの方法を解説していますが、説明する内容は必要最低限のオプションのみを設定しています。
運用方法によっては他のオプションを設定する必要があると思いますので、それらは各自でご検討を願いいたします。
差分バックアップとは
差分バックアップとは、ベースとなるバックアップとそのベースからの変更内容を記録したバックアップの2種類のバックアップを使用してデータを保存する方法です。
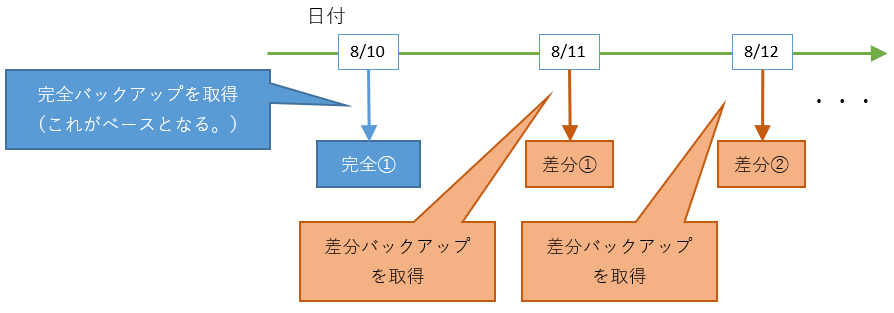
上記の図のようにバックアップをとっていった場合、
それぞれの時点の状態に復元する方法は次の通りです。
・8/10の状態に戻したい場合
⇒ 完全①をリストアする。
・8/11の状態に戻したい場合
⇒ まず完全①をリストアし、次に差分①をリストアする。
・8/12の状態に戻したい場合
⇒ まず完全①をリストアし、次に差分②をリストアする。
差分バックアップの取り方
ここではバックアップの取り方を解説します。
まず完全バックアップを取得し、次に差分バックアップをとります。
SQLServerManagementStudioを使用します。
まず完全バックアップを取得する
まず先に完全バックアップを取得します。
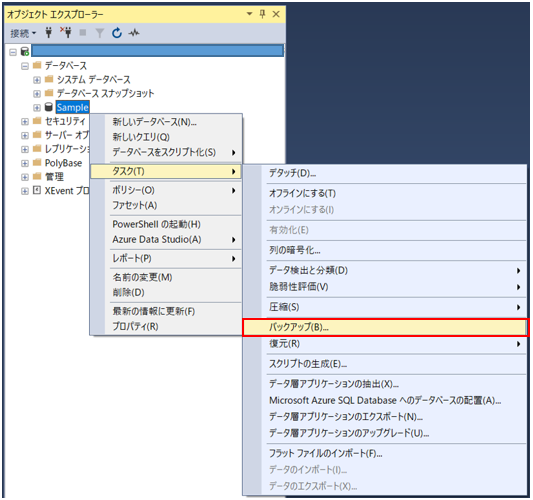
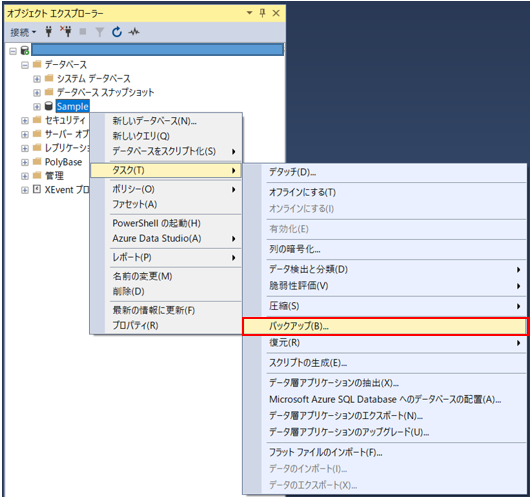
1.バックアップをとりたいデータベースを右クリックし、[タスク(T)]->[バックアップ(B)…]を選択します。
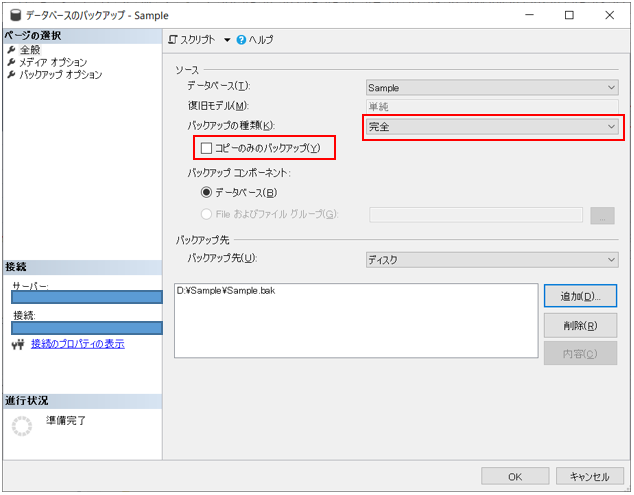
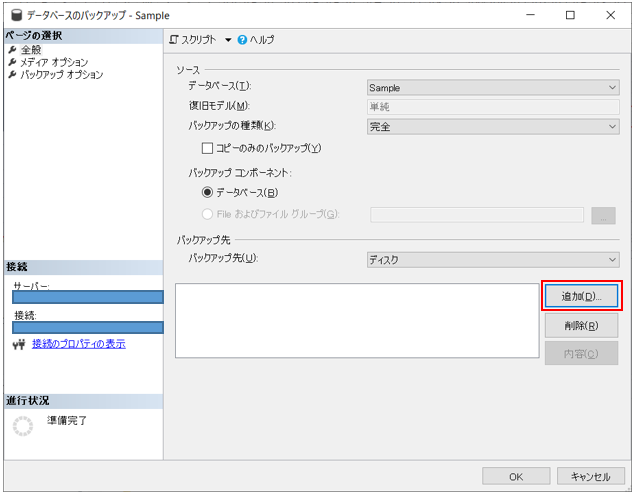
2.バックアップの種類が”完全”になっており、コピーのみのバックアップにチェックがついていないことを確認します。
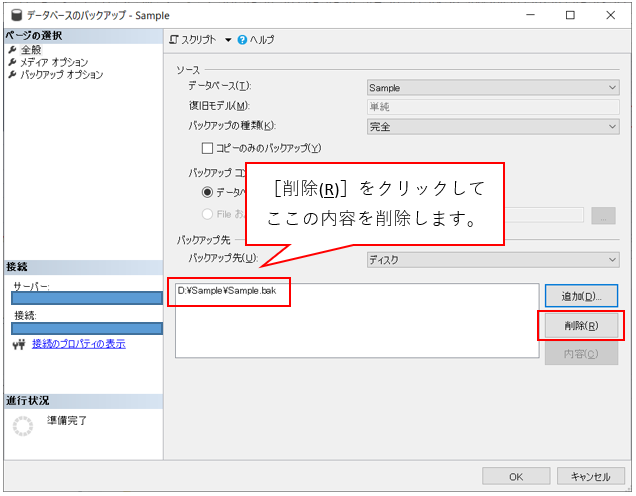
3.[削除(D)…]をクリックして、バックアップ先として既に表示されているファイル名を削除してください。
※このファイルで名問題なければ削除する必要はありません。その場合4、5、6、7の操作も不要です。
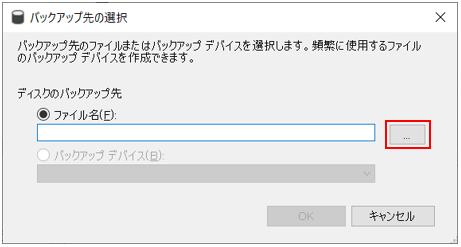
4.[追加(D)…]をクリックします。
5.[…]をクリックします。
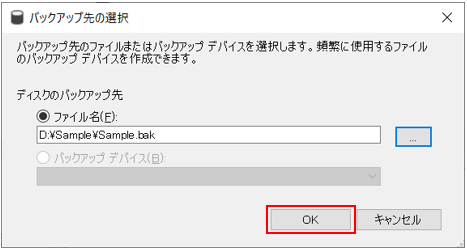
6.ファイル名を入力し、[OK]をクリックします。

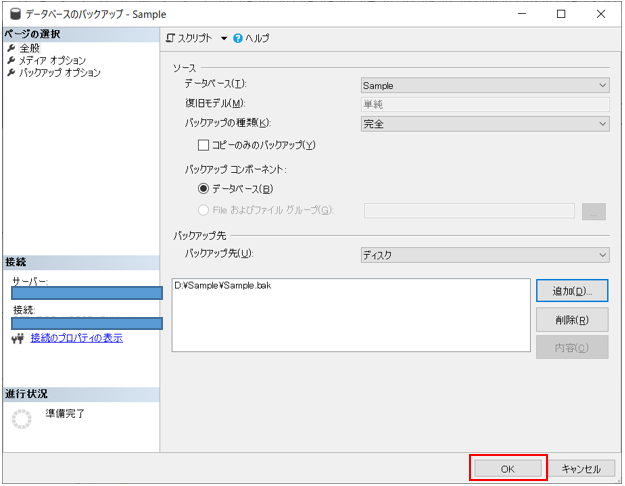
7. [OK]をクリックします。
8.[OK]をクリックします。
次に差分バックアップを取得する
完全バックアップをとったら、次に差分バックアップを取得します。
1.バックアップをとりたいデータベースを右クリックし、[タスク(T)]->[バックアップ(B)…]を選択します。
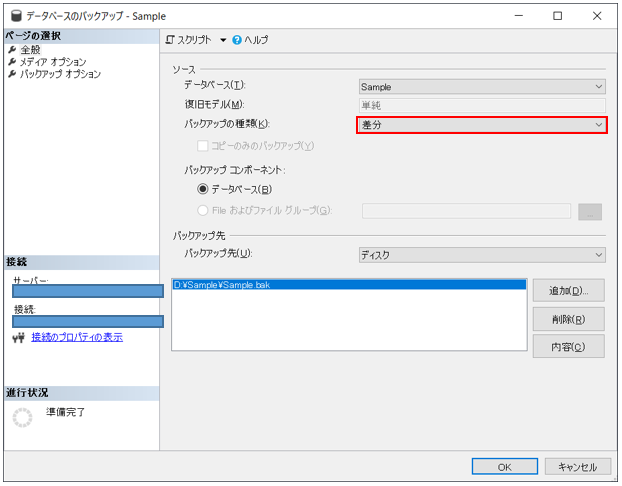
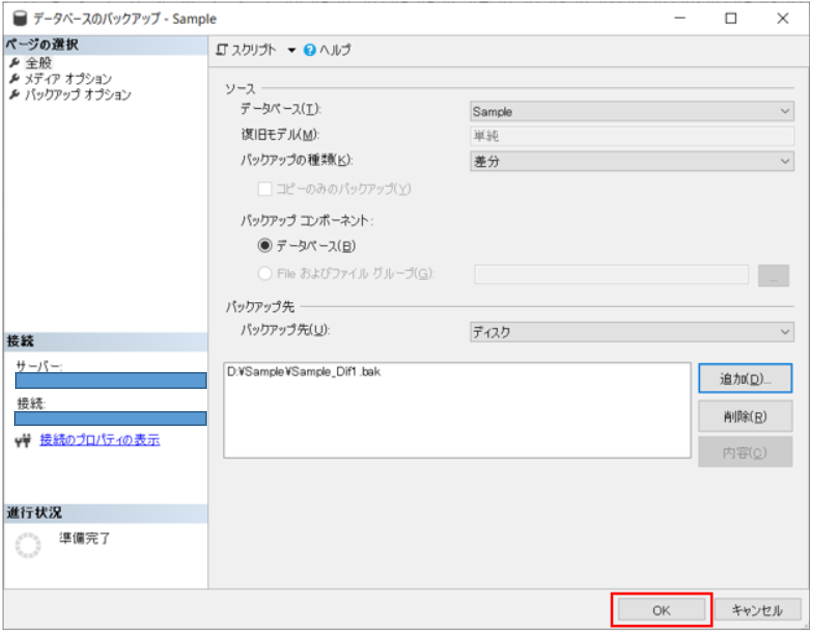
2.バックアップの種類を”差分”にします。
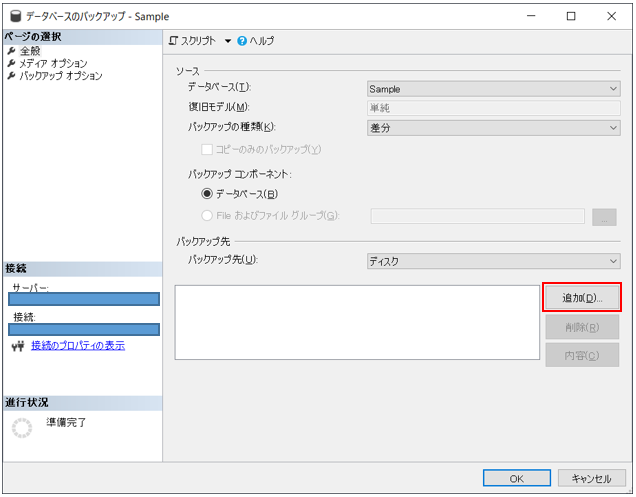
3.[削除(D)…]をクリックして、バックアップ先として既に表示されているファイル名を削除してください。
※このファイル名で問題なければ削除する必要はありません。その場合4、5、6、7の操作も不要です。

4.[追加(D)…]をクリックします。
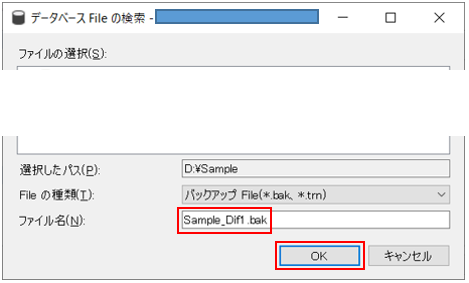
5.[…]をクリックします。

6.ファイル名を入力し、[OK]をクリックする。
7.[OK]をクリックします。

8.[OK]をクリックします。
リストアの方法
差分バックアップの取り方項で取得した完全バックアップ、差分バックアップをリストアする方法を解説します。
まず先に完全バックアップをリストアし、次に差分バックアップをリストアします。
SQLServerManagementStudioを使用します。
まず完全バックアップのリストアする
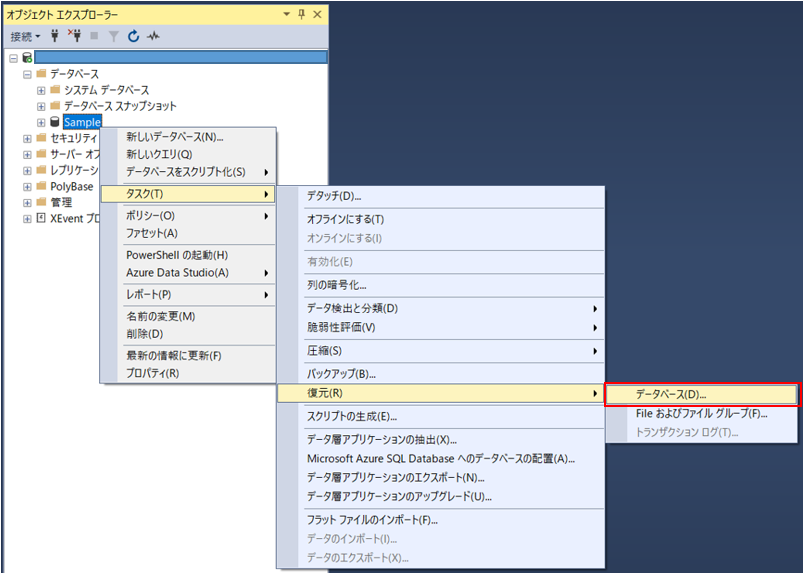
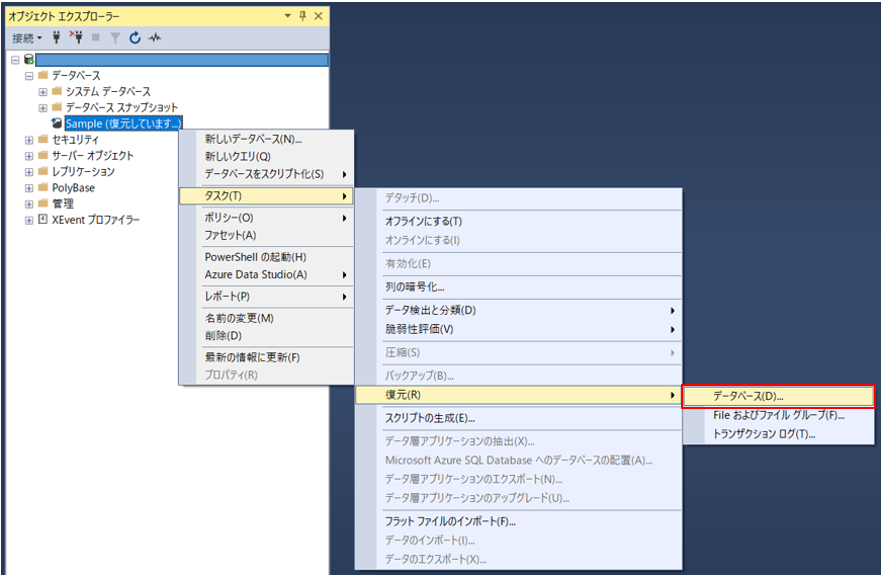
1.リストアしたいデータベースを右クリックし、[タスク(T)]->[復元(R)]->[データベース(D)…]をクリックします。
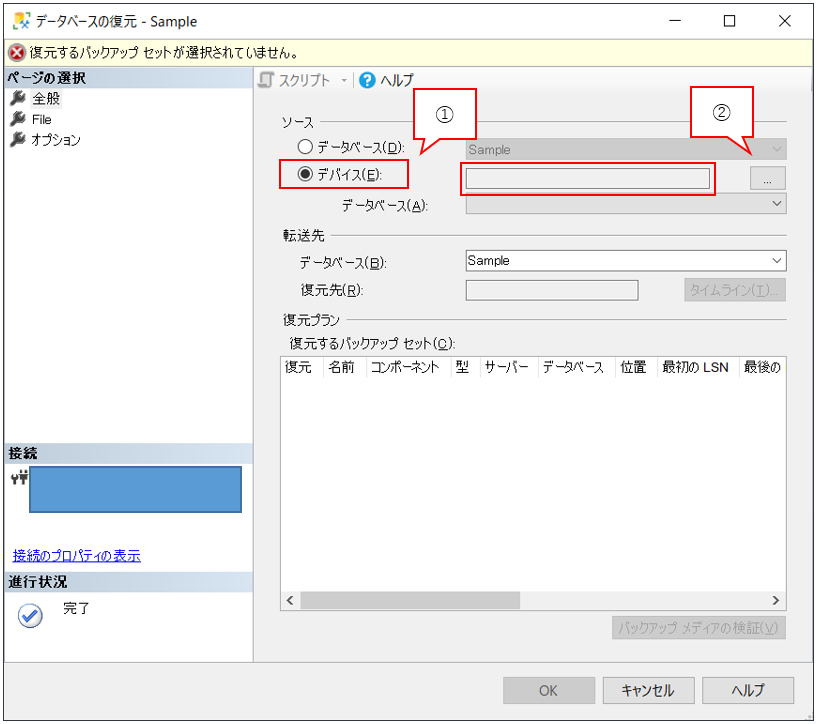
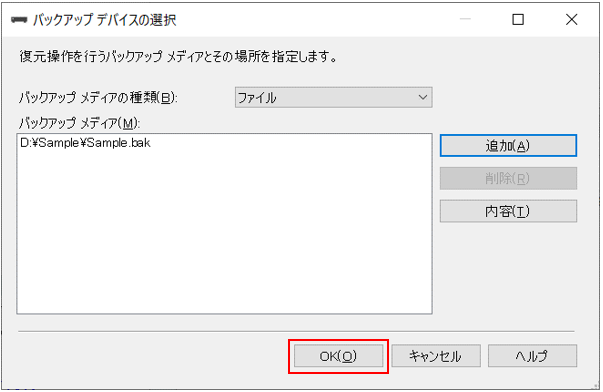
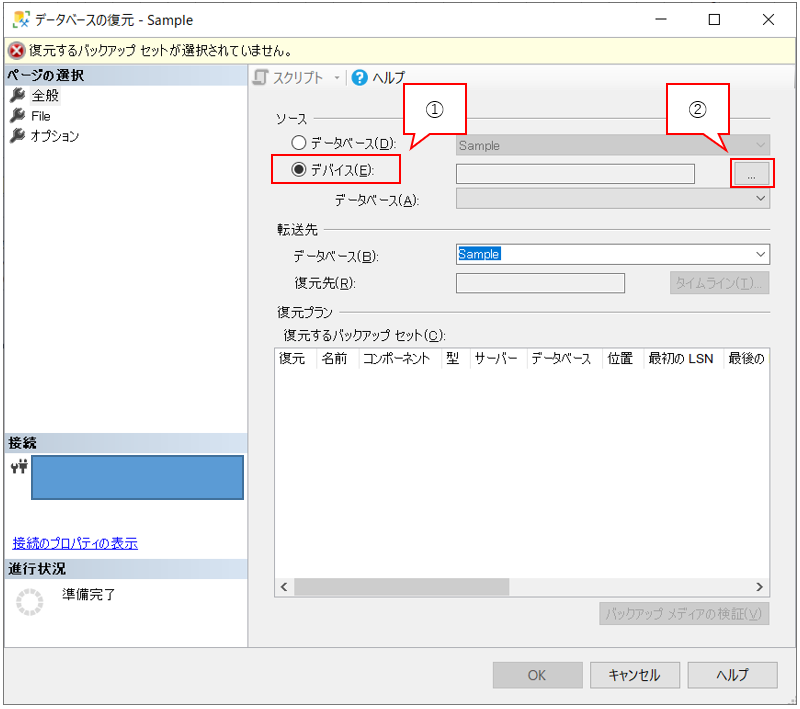
2.ソースの”デバイス”にチェックをつけ、[…]をクリックします。
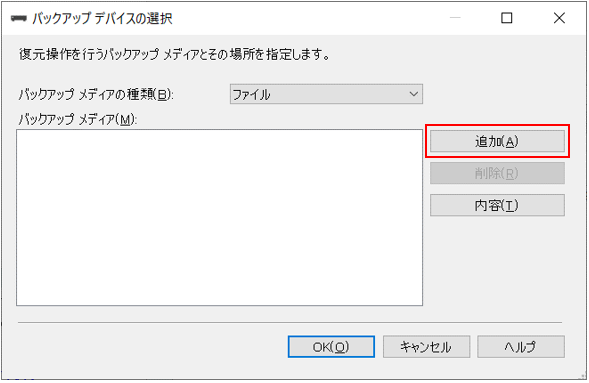
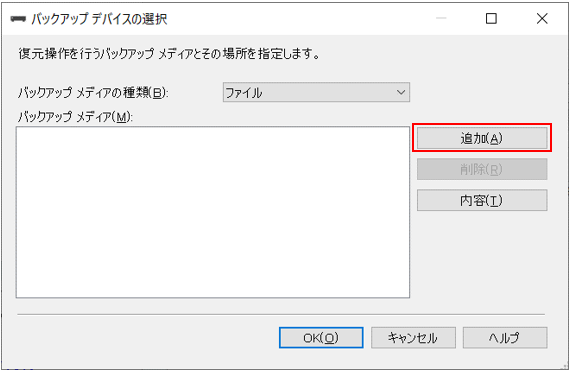
3.[追加(A)]をクリックします。
4. 3-1項で作成した完全バックアップを選択し、[OK]をクリックします。
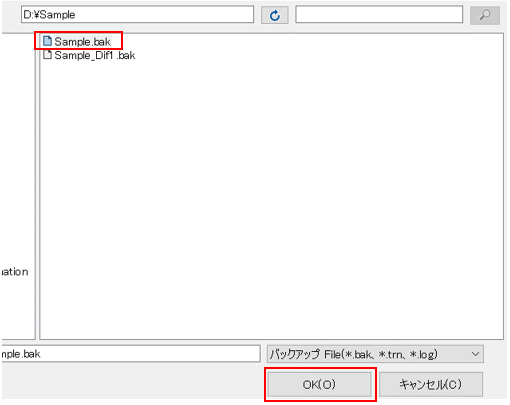
5.[OK(O)]をクリックします。
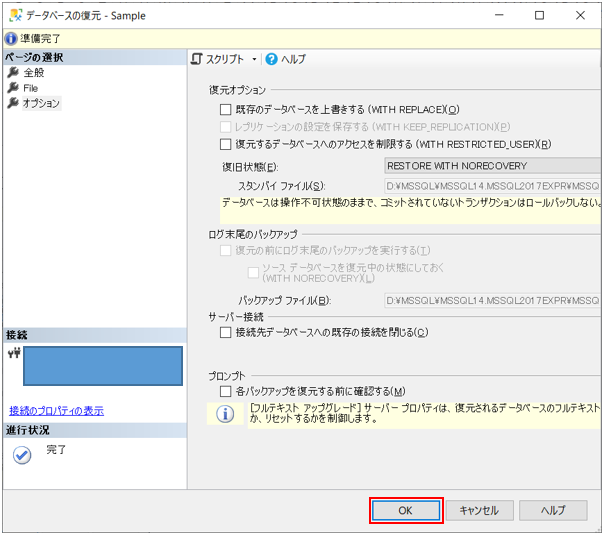
6.”オプション”ページの”復元状態”プルダウンメニューから”RESTORE WITH NORECOVERY”を選択します。
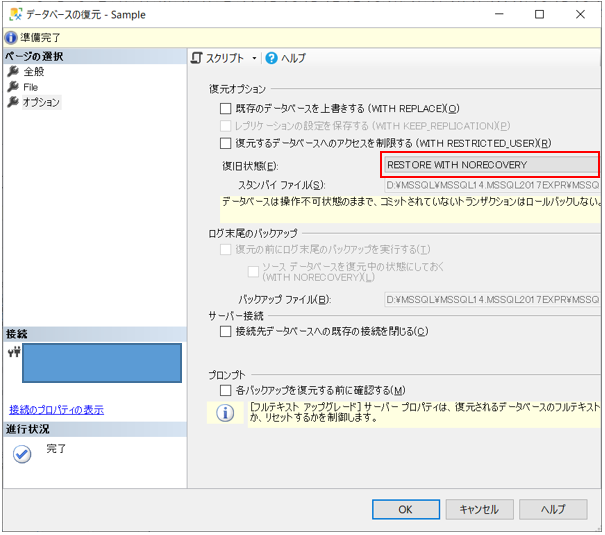
(補足)
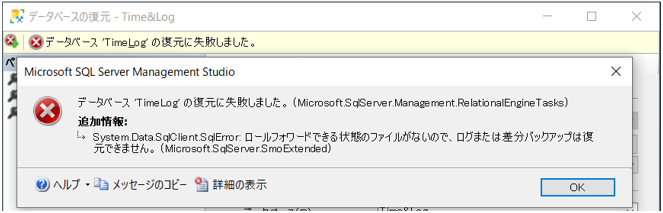
“RESTORE WITH RECOVERY”にしたままリストアし、次に差分バックアップをリストアするとエラーになります。
7.[OK]をクリックします。
次に差分バックアップのリストアする
完全バックアップが終わったら、次は差分バックアップをリストアします。
1.リストアしたいデータベースを右クリックし、[タスク(T)]->[復元(R)]->[データベース(D)…]をクリックします。
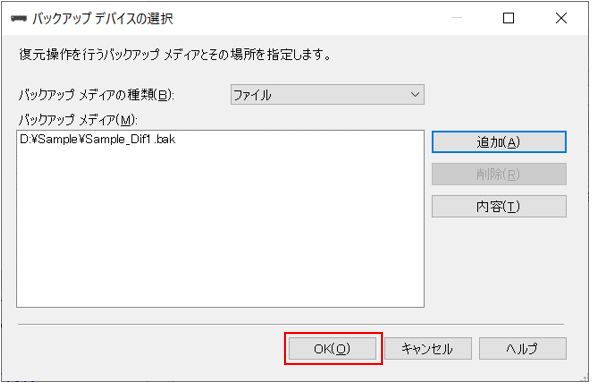
2.ソースの”デバイス”にチェックをつけ、[…]をクリックします。
3.[追加(A)]をクリックします。
4. 3-2項で作成した差分バックアップを選択し、[OK]をクリックします。
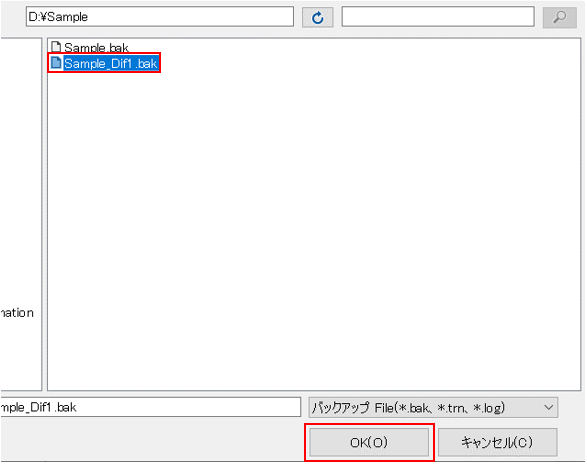
5.[OK(O)]をクリックします。
6.[OK(O)]をクリックします。
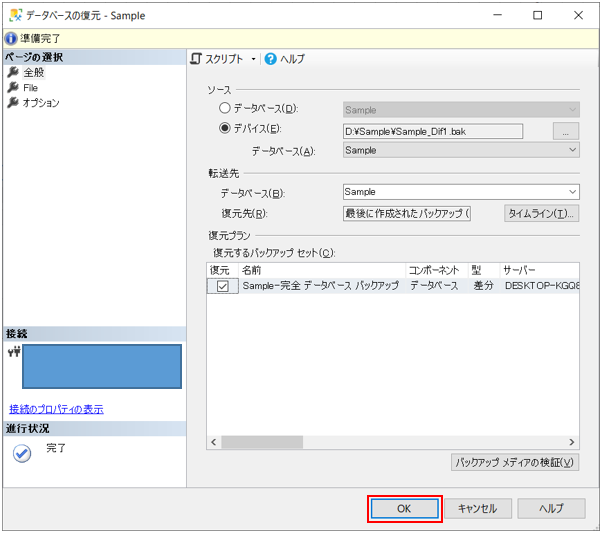
7.これでリストアは完了です。